
This post may contain affiliate links. As an Amazon Associate, I earn from qualifying purchases. Please read my disclosure.
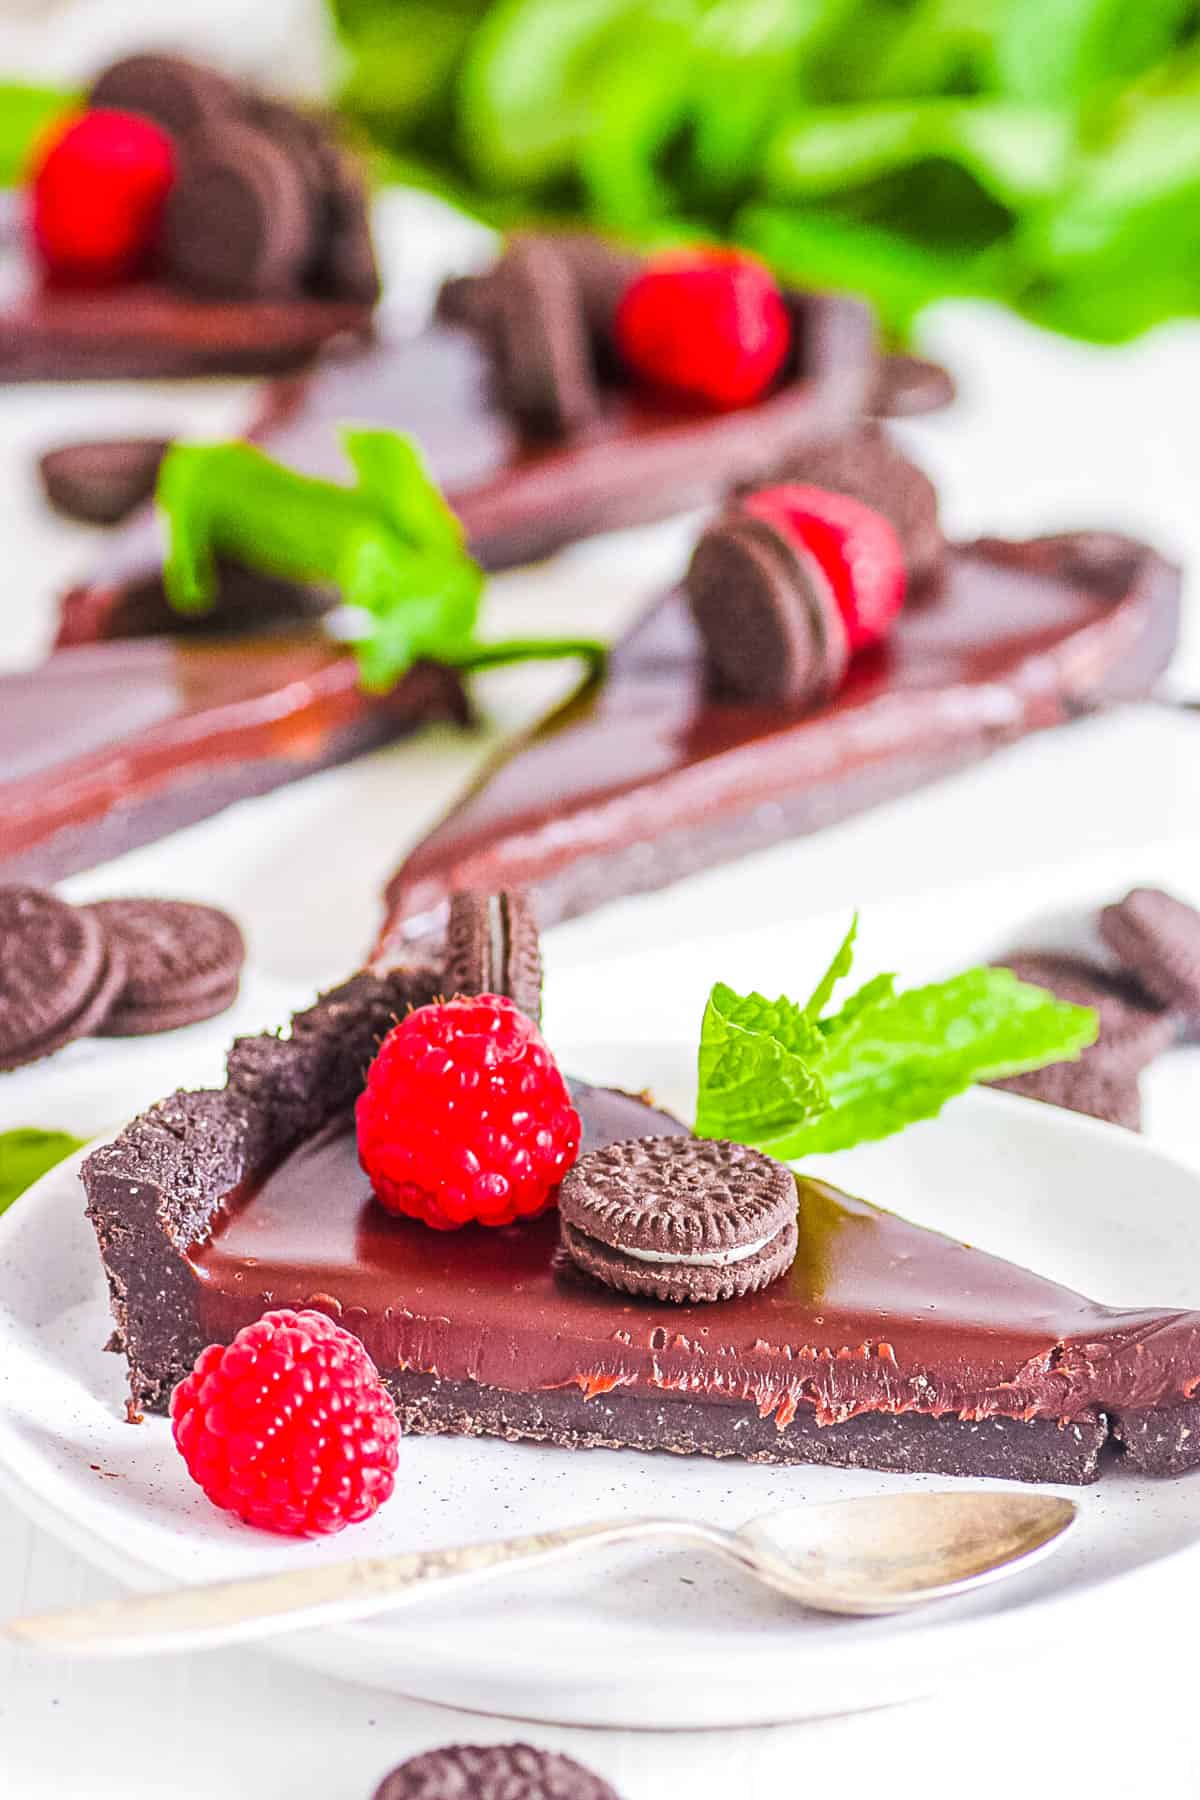
If you are looking for a quick dessert featuring the world’s most beloved stuffed cookie, you need to make this no-bake Oreo tart. I make this with chocolate chips, heavy cream, and Oreo cookies. All it takes is 10 minutes of prep, and I leave the rest up to my refrigerator. The filling is smooth, rich, and sits over a crisp cookie crust. Do not be fooled, this simple recipe delivers bold flavor.
Few desserts, let alone no-bake desserts, deliver the same chocolatey richness as this Oreo tart. The combination of a silky filling and crisp crust creates a texture similar to my vegan lemon tart, which is a great recipe if you prefer fruit-based desserts.
This Oreo tart came from a place many of my no-bake desserts come from: A desperate need to get out of the kitchen. I love desserts, and I love baking, but in Summer it can feel like a chore. I had planned on making my Oreo donuts for a party, but the heat was too much to handle. Instead, I made this dessert in a few quick minutes, popped it in the fridge, and spent the rest of the day at the beach.
What stands out to me first is how this Oreo tart balances indulgence with simple ingredients and ease with impressive results. Yes, this is dessert, and yes, it is absolutely scrumptious, but it is worth noting that the ingredients do play a nutritional role. Dark chocolate contains antioxidants that support heart health, while the raspberries add vitamin C and fiber.
I make sure the cookie crumbs are finely processed so the crust remains intact. Pouring hot cream over my chocolate creates a smooth ganache which sets evenly, and allowing enough chilling time ensures the filling firms up properly, giving each slice a clean finish and luxurious texture. But as I have said, this recipe is extremely easy, even for those who shy away from making desserts.
I have a British friend who has always been thoroughly entertained by the Americans using the word tart. The last time she came over, I knew I had to make this dessert for her. When she asked what it was, she could not contain her laughter and declared that for Halloween, she would be dressing up as an Oreo tart. Obviously, a few months went by, and I had forgotten all about that night, until she showed up on my doorstep in a black and white outfit completely accessorized with Oreos. Ha! I love it when desserts bring out our inner silliness.
Latest Recipe Video!
🥘 Ingredients
These are the ingredients I use to create this deceptively easy dessert:
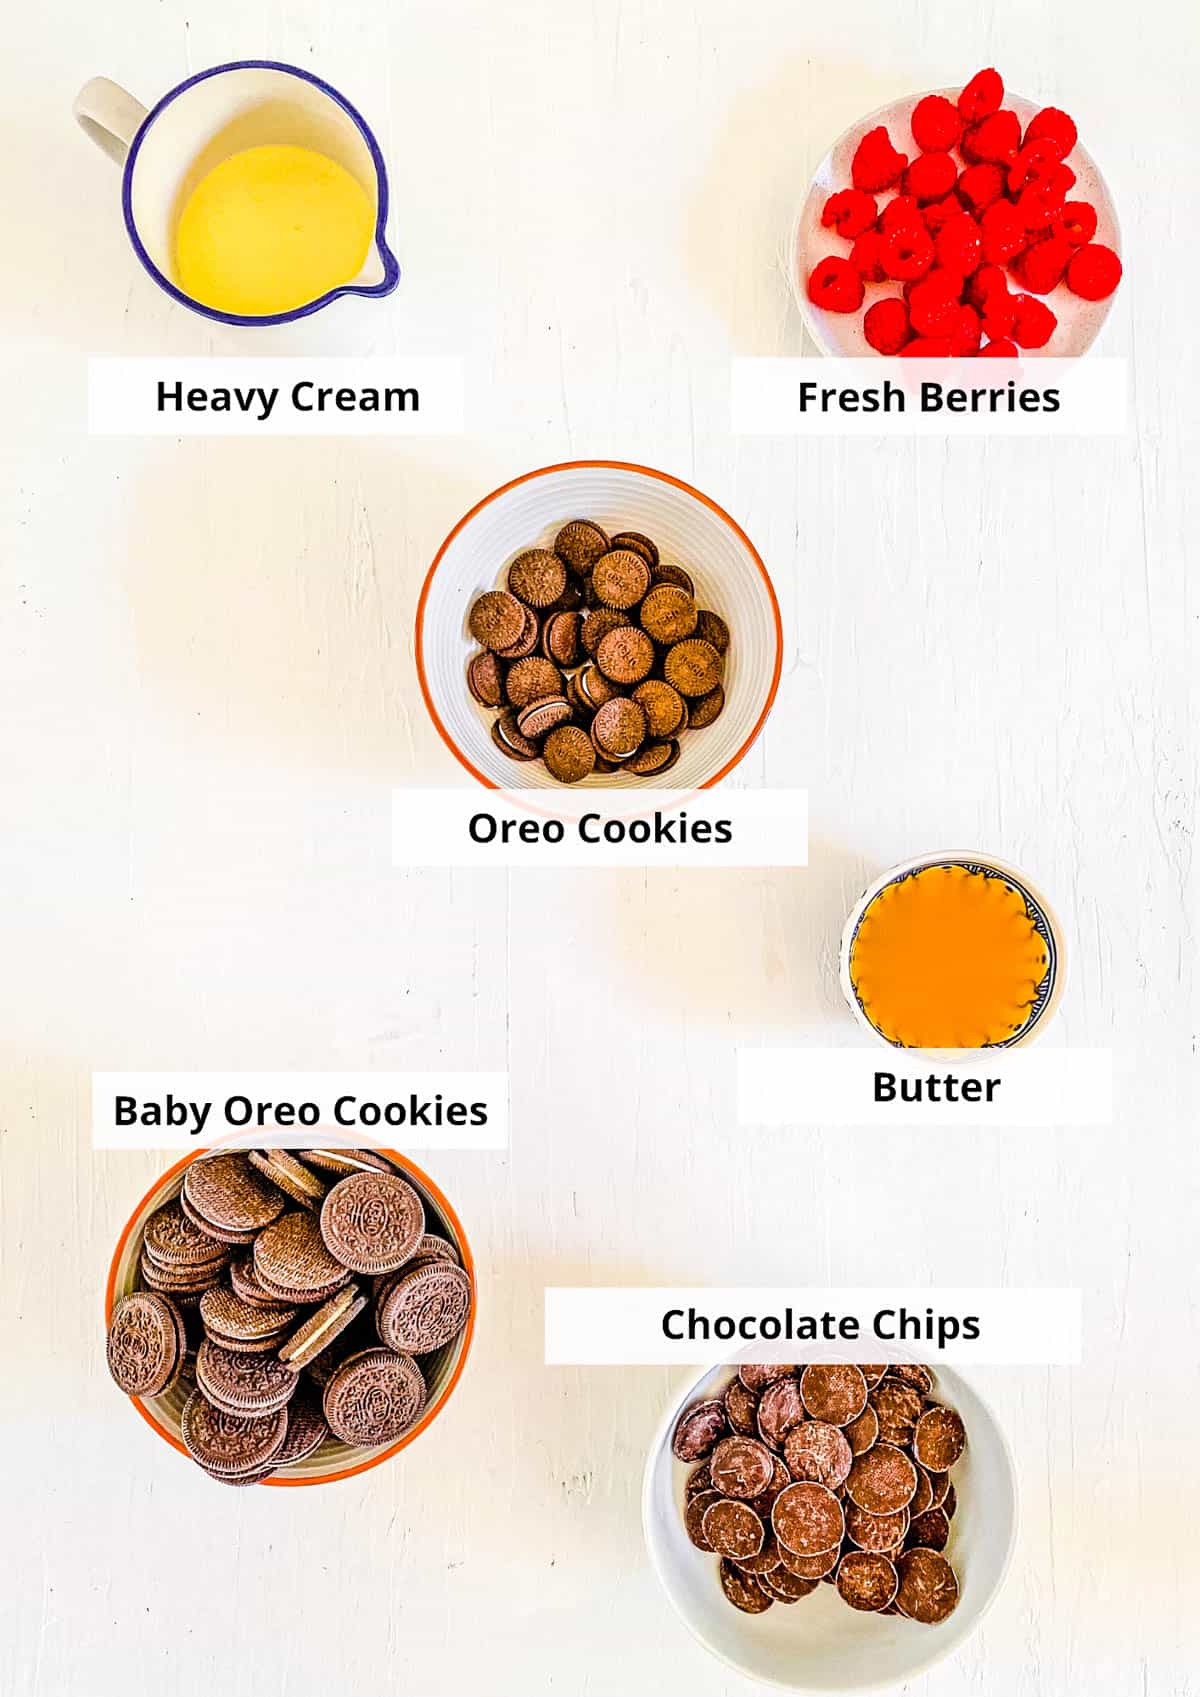
Oreo cookies: I use large Oreo cookies to create the rich crust, and baby Oreo cookies for decorating once the tart is set.
Butter: This mixes with my cookie crumbs to help the base hold its shape.
Chocolate chips: I use semi-sweet or dark chocolate, depending on how rich I want the filling.
Heavy cream: I heat this to pour over the chocolate, to create a glossy ganache.
Fresh berries: Raspberries add a great pop of color and a fresh contrast.
🔪 How To Make
I follow a straightforward no-bake method to bring this Oreo tart together quickly. This is what I do:
Pulse the Oreos: I blend the large Oreo cookies in a food processor until they form fine crumbs with no large pieces.
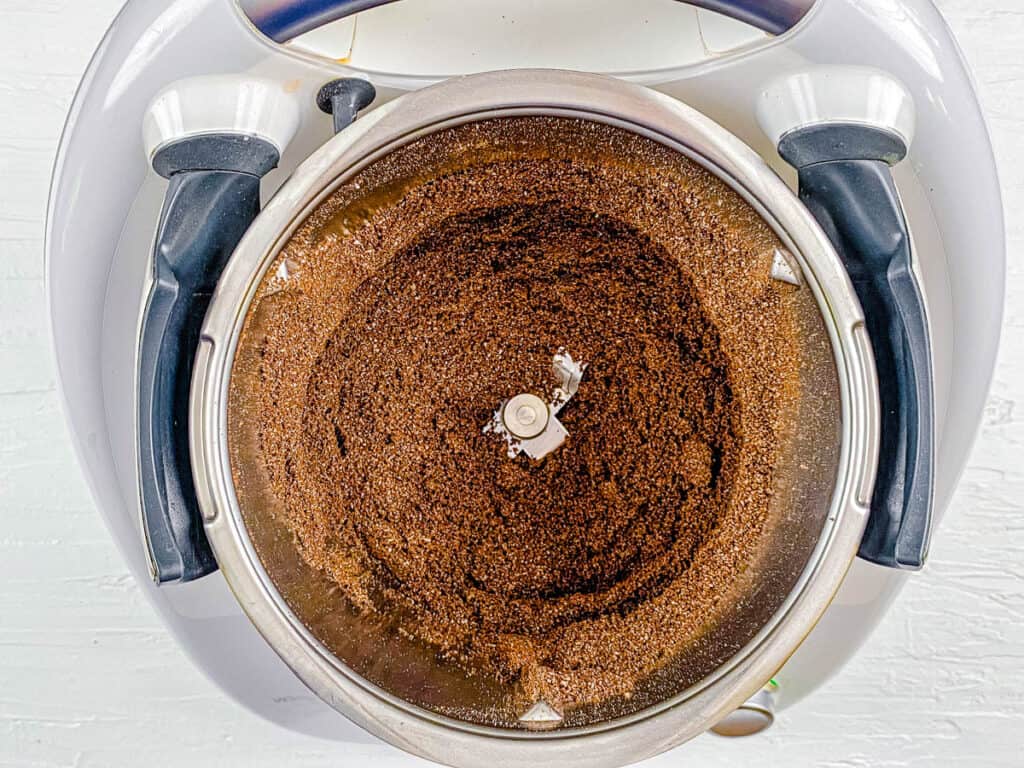
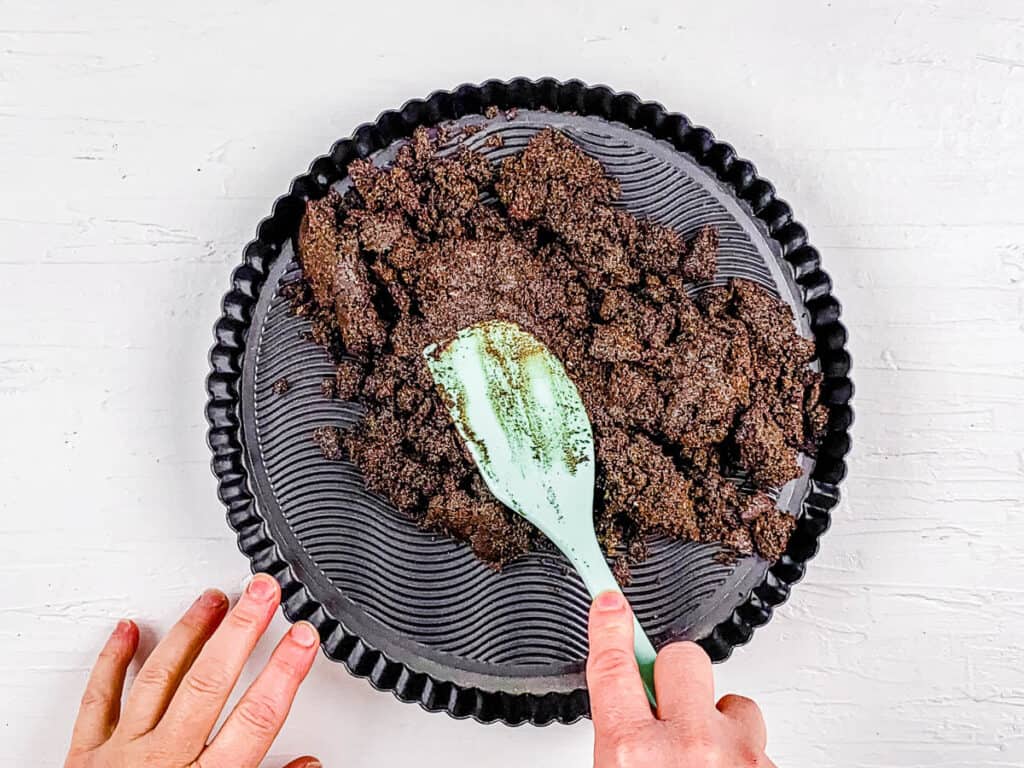
Add butter: Then I mix the crumbs with the melted butter and stir until the texture resembles wet sand.
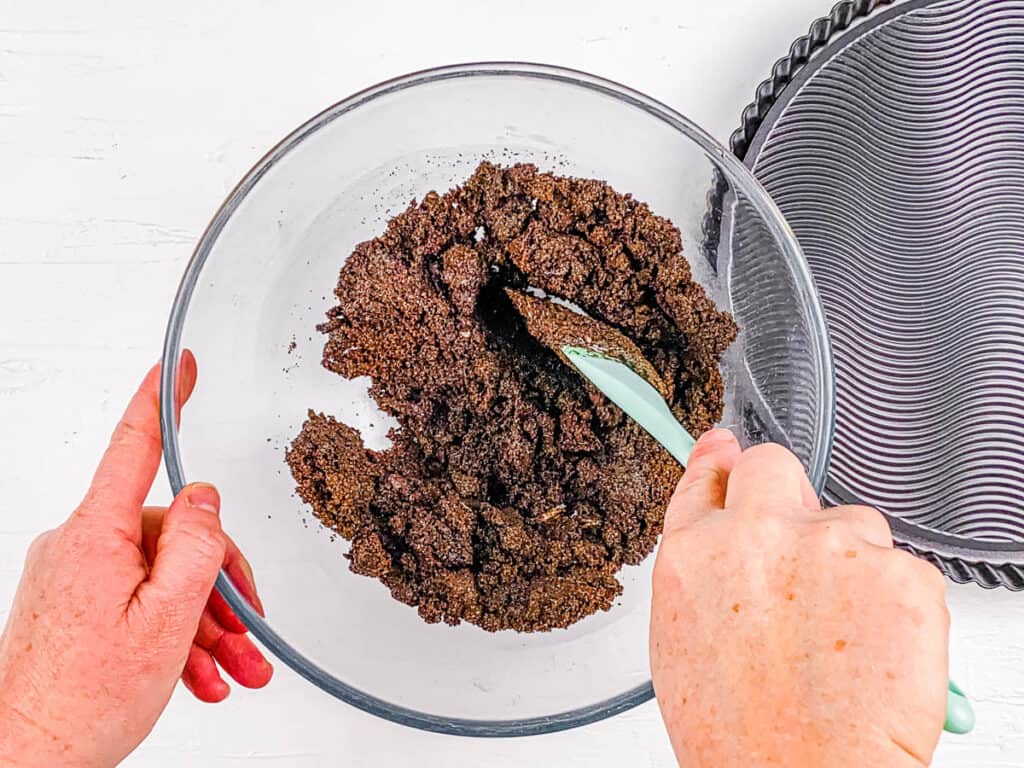
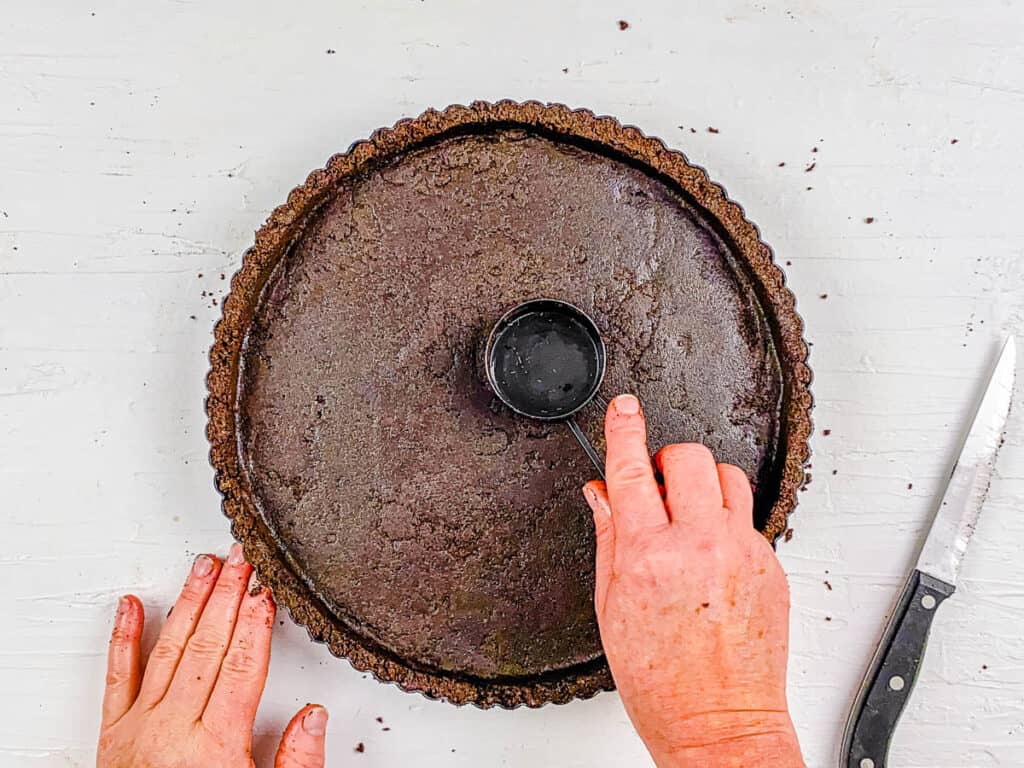
Make crust: I take this crumb mixture and press it firmly into a tart pan, making sure to cover the base and the sides sufficiently.
Refrigerate base: I place the crust in the refrigerator to set while I prepare the filling.
Heat cream: Then I heat my cream until hot but not boiling.
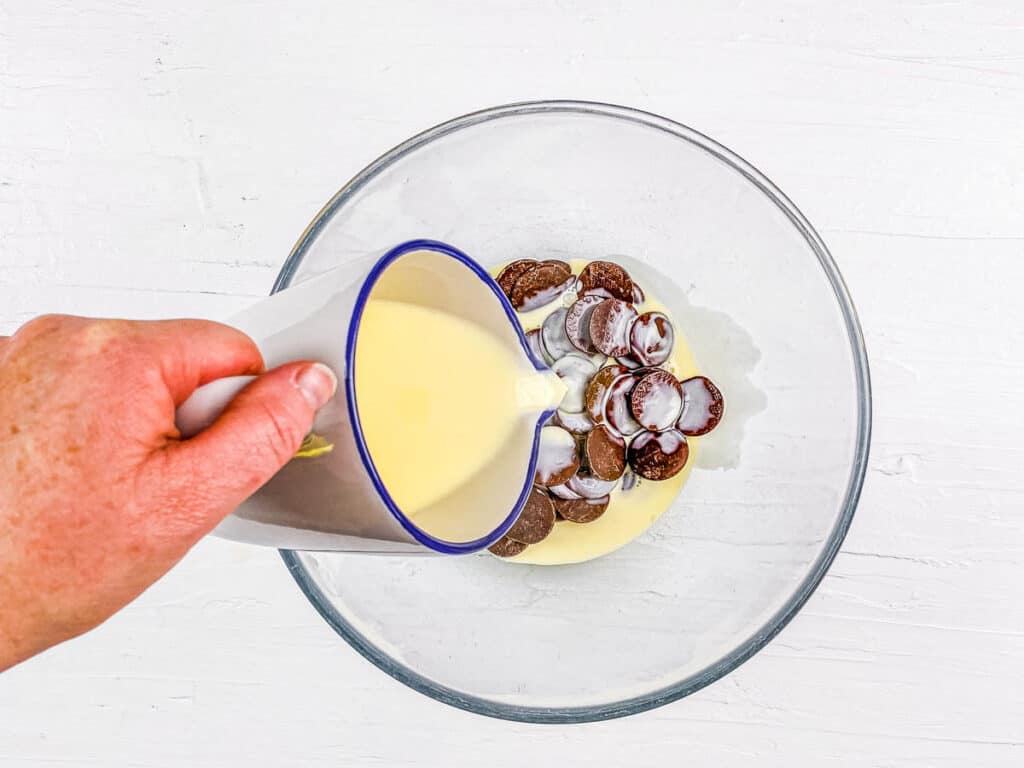
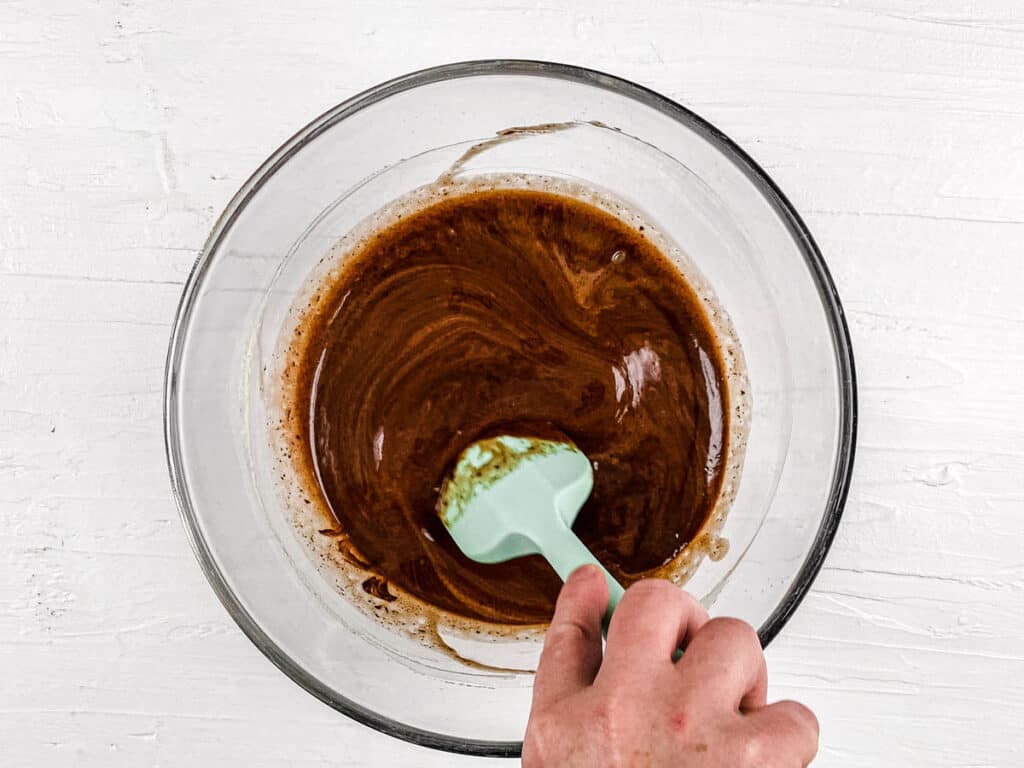
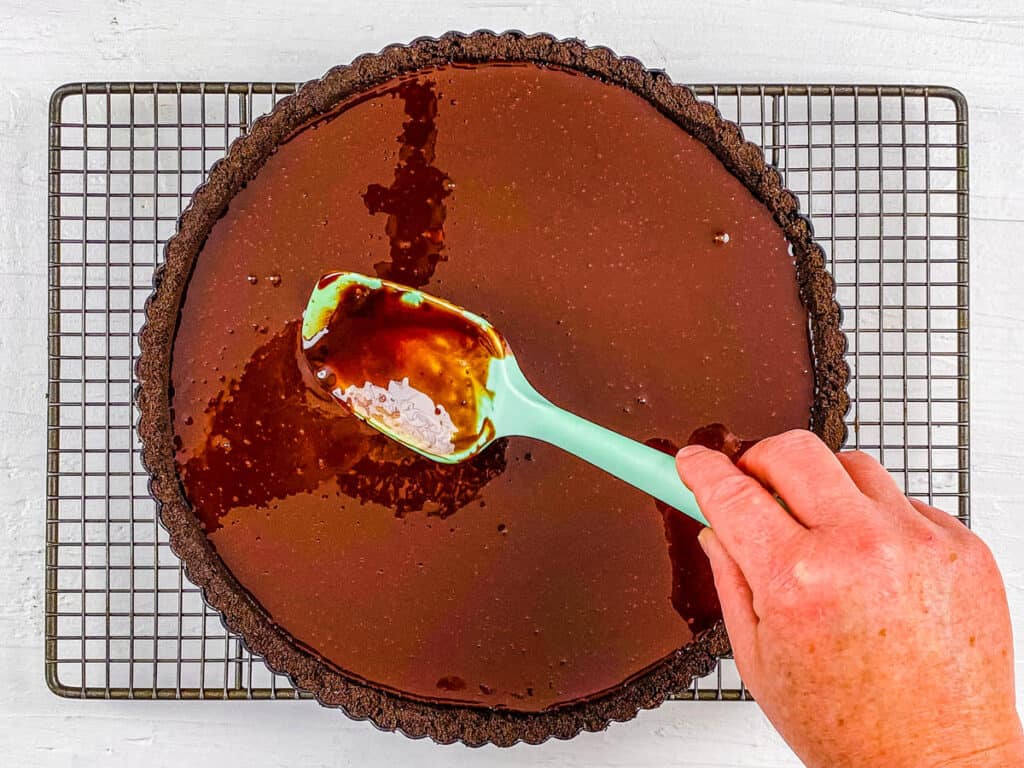
Make ganache: I pour the hot cream over my chocolate chips and stir until completely smooth and shiny.
Add filling to base: I remove my bases from the refrigerator and spread my chocolate ganache over the chilled crust. Then I place my filled tarts into the refrigerator and allow them to set for at least 4 hours.
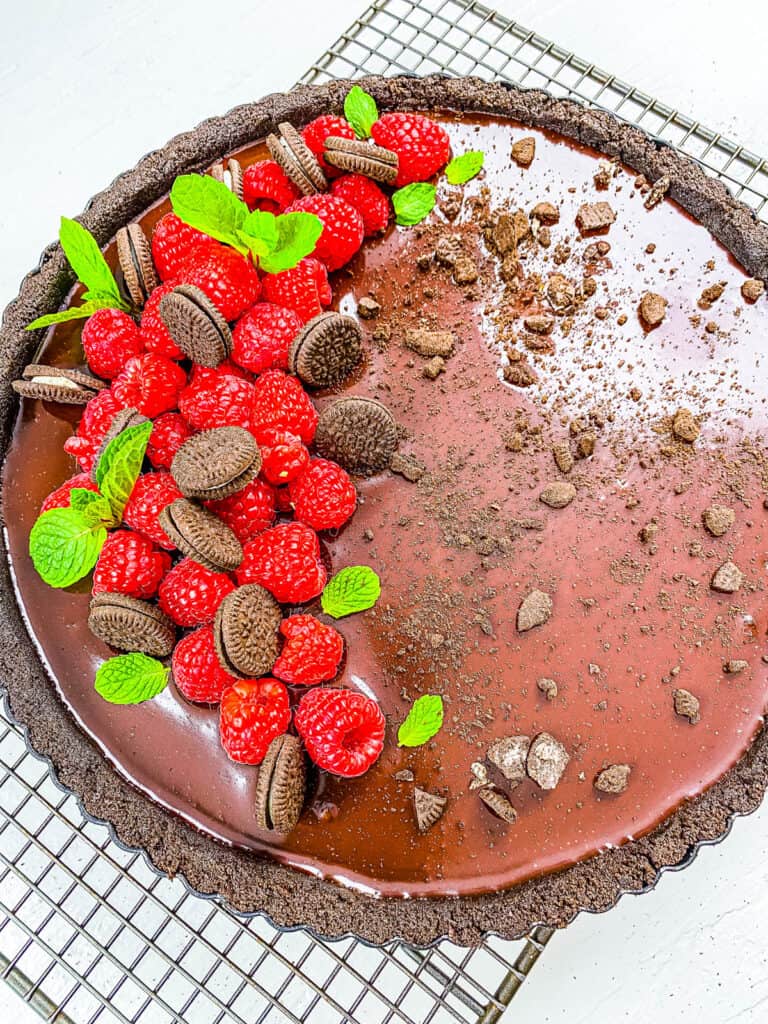
Decorate and serve: Once set, I decorate the tart with my fresh berries and baby Oreos before slicing and serving.
My #1 Secret Tip for this Oreo tart recipe is to heat the cream properly before pouring it over the chocolate. I make sure that my cream is hot enough to melt the chocolate completely. Otherwise, the mixture becomes lumpy.
Other Tips To Keep In Mind:
- Chill fully: If possible, I like leaving this tart in the refrigerator overnight. This guarantees that my filling is set properly and that the crust is held together. This tart can even be made up to 4 days in advance.
- Use good-quality chocolate: Since chocolate is the main ingredient in the filling, I always use good-quality chocolate for the best flavor and texture. Avoid using cooking chocolate for this recipe.
- Slice with a warm knife: When I slice this tart, I run a sharp knife under hot water and dry it off before using it. This gives me clean slices without dragging any of the filling.
- Cover loosely: I make sure to cover my tarts with a large domed lid or loose plastic wrap that does not touch the surface. This recipe uses cream, which has a habit of absorbing smells in the refrigerator.
- Press crust firmly: I make sure that I press my crumbs into the tart pan firmly, and avoid leaving any gaps. This helps my crust stay intact and not crumble when it is sliced.
📖 Variations
These are a few ways that I have customized my Oreo tarts over the years:
Marbled filling: After I have filled my crusts with the ganache, I drizzle 1/4 cup of melted white chocolate over in a pattern, and use a skewer to gently create a marbled effect. This pays homage to the classic Oreo colors.
Peanut butter swirl: Before adding the filling to the crusts, I stir 2 tablespoons of softened peanut butter into the ganache. This creates a richer dessert, which my kids love, because it combines two of their favorite things.
Chunky Oreo filling: I take 1/4 cup of roughly chopped Oreo cookies and scatter them over the top of the filled tarts just before they go into the refrigerator. This gives me a chunkier texture and a more distinctive Oreo flavor.
🍽 Serving Suggestions
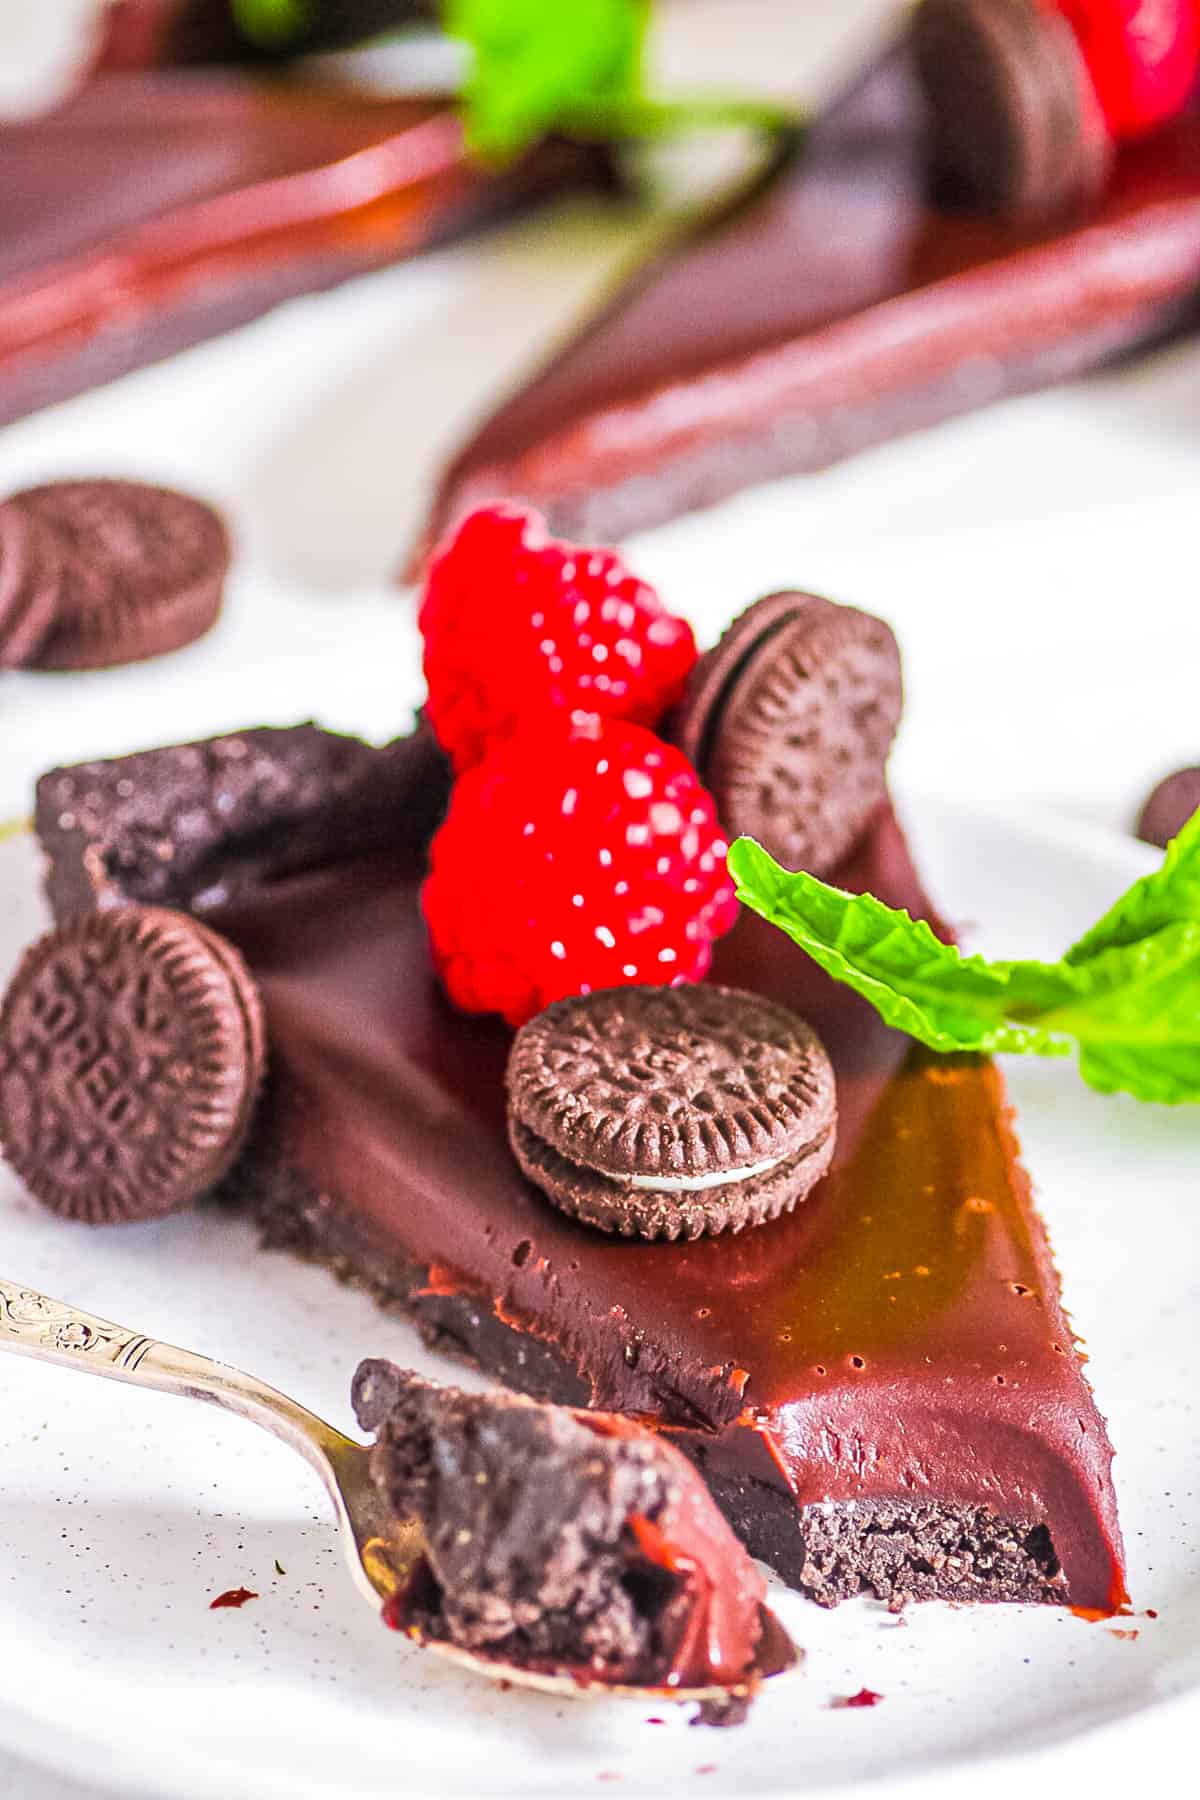
I love topping these Oreos with fresh berries and a piped rosette of my vegan whipped cream. But the thing I love serving most with this tart is other decadent no-bake desserts. Next summer, when you are laying out a dessert spread, do not confine yourself to a hot kitchen; instead, try my no bake chocolate cheesecake or my healthy no bake date bars. Just make sure you have plenty of space in your refrigerator.
A few months ago, I made this dessert to bring along to a friend’s cookout, but amid all the chaos of getting the kids out of the house, I had forgotten it in the refrigerator at home. Luckily, the hostess was understanding and the other sides I brought sufficed. When we got home, my husband and kids made a beeline for the fridge and took out the tart. I made some vegan strawberry milk, while my husband took out some mango mochi ice cream from the freezer, and we decided to have our own little party in the kitchen. I was about to slice when my kids suggested we eat it straight out of the pan. Best idea ever.
🧊 Storing And ♨️ Reheating
Refrigeration: I cover the tart and store it in the refrigerator for up to 5 days.
Freezing: I freeze individual slices in a freezer-safe container, which keeps for up to 3 months.
Reheating: There is no reheating required as this tart is best served cold. If frozen, I thaw the slices in the refrigerator until ready to serve.
❓ Recipe FAQs
This usually comes down to the ratio of cream to chocolate. If I have used slightly too much cream, it stays soft. I recommend allowing your tart to chill overnight if it has not yet set within the 4-hour time frame.
No, the filling is a key part of the recipe. It adds a sweetness and also helps bind the crumbs together with the butter. Removing it would lead to a dry, crumbly crust that likely would not hold its shape very well.
This is likely due to your mixture being too dry. But it is an easy fix. I recommend adding 1 teaspoon of melted butter to your crumbs until they resemble wet sand and hold together if you squeeze some of it in your hand. Be careful not to over-saturate your crust with butter. This will make the base soggy and oily, and it will probably fall apart.

Love this healthy dessert recipe? Please leave a 5-star rating 🌟 in the recipe below and/or a review in the comment section further down the page!
You can also FOLLOW ME on FACEBOOK, INSTAGRAM, and PINTEREST to see more delicious, healthy, family-friendly food, and if you have any questions, I’m here to help!
📋 Recipe Card
Oreo Tart
If you are looking for a quick dessert featuring the world’s most beloved stuffed cookie, you need to make this no-bake Oreo tart. I make this with chocolate chips, heavy cream, and Oreo cookies. All it takes is 10 minutes of prep, and I leave the rest up to my refrigerator. The filling is smooth, rich, and sits over a crisp cookie crust. Do not be fooled, this simple recipe delivers bold flavor.
Servings: 16 slices
Calories: 261kcal
- My #1 Secret Tip for this Oreo tart recipe is to heat the cream properly before pouring it over the chocolate. I make sure that my cream is hot enough to melt the chocolate completely. Otherwise, the mixture becomes lumpy.
- Chill fully: If possible, I like leaving this tart in the refrigerator overnight. This guarantees that my filling is set properly and that the crust is held together. This tart can even be made up to 4 days in advance.
- Use good-quality chocolate: Since chocolate is the main ingredient in the filling, I always use good-quality chocolate for the best flavor and texture. Avoid using cooking chocolate for this recipe.
- Slice with a warm knife: When I slice this tart, I run a sharp knife under hot water and dry it off before using it. This gives me clean slices without dragging any of the filling.
- Cover loosely: I make sure to cover my tarts with a large domed lid or loose plastic wrap that does not touch the surface. This recipe uses cream, which has a habit of absorbing smells in the refrigerator.
- Press crust firmly: I make sure that I press my crumbs into the tart pan firmly, and avoid leaving any gaps. This helps my crust stay intact and not crumble when it is sliced.
Serving: 1slice | Calories: 261kcal | Carbohydrates: 25g | Protein: 2g | Fat: 18g | Saturated Fat: 10g | Polyunsaturated Fat: 1g | Monounsaturated Fat: 5g | Trans Fat: 1g | Cholesterol: 31mg | Sodium: 159mg | Potassium: 76mg | Fiber: 1g | Sugar: 16g