
Chocolate sponge cake layered with strawberry ice cream and topped with fresh strawberries. Frozen until firm. Clean slices with a warm knife.
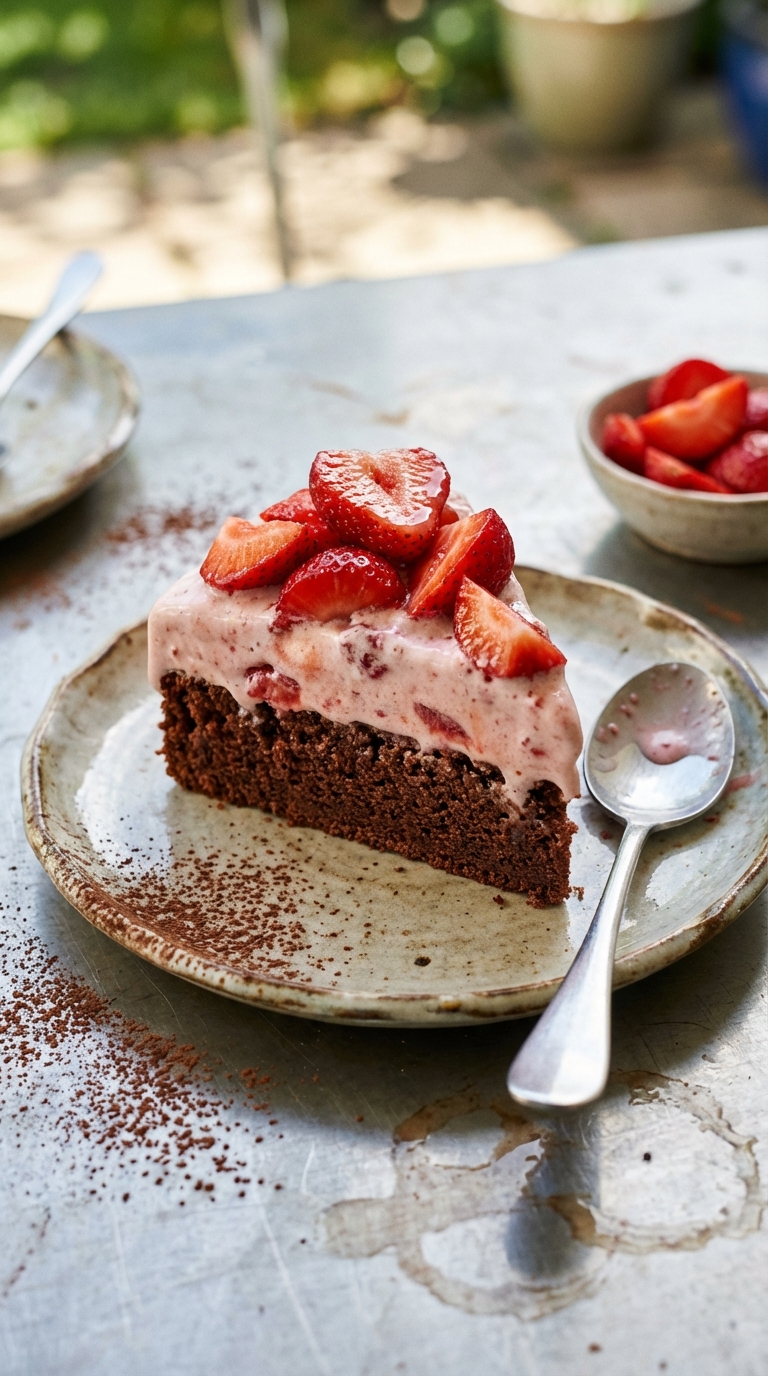
My daughter asked for an ice cream cake for her birthday and I did not want to buy one. I made a chocolate sponge with eggs, sugar, oil, milk, flour, cocoa powder, and baking powder, let it cool completely, then spread a thick layer of strawberry ice cream over the top. Fresh strawberries went on last. Everything went into the freezer until firm. When I brought it out, the sponge had set against the ice cream like a proper cake, and every slice had a clean line between dark chocolate and pink strawberry.
The sponge has to be completely cool before the ice cream goes on. Warm cake melts the ice cream instantly and you end up with a soggy mess. Bake the sponge a day ahead if you can. A thin, dense sponge works better than a tall, fluffy one because it does not crumble when frozen. My daughter asked for it again for her half-birthday, which is apparently a thing now.
Tips for Building an Ice Cream Cake
Soften the ice cream before spreading
Take the strawberry ice cream out of the freezer 10 to 15 minutes before you need it. It should be spreadable but not liquid.
Use an offset spatula and work quickly. Once the ice cream is on the sponge, smooth the surface and get it back into the freezer immediately. You have about five minutes before it starts melting off the edges.
Freeze in stages
Spread the ice cream, freeze for two hours until firm. Then add the fresh strawberries on top and freeze again for at least one more hour.
Adding the strawberries too early means they sink into the soft ice cream. Freezing in stages keeps each layer distinct and clean.
Print

Ice cream cake
Total Time: 295 minutes
Yield: 8 servings
Description
This dreamy Strawberry Ice Cream Cake combines a rich cocoa sponge base with creamy strawberry ice cream and fresh strawberries, making it a perfect summer dessert.
Instructions
- Preheat your oven to 350°F (175°C).
- In a bowl, beat the eggs and sugar until light and fluffy.
- Mix in the oil and milk.
- Sift together the flour, cocoa powder, and baking powder, then fold into the wet ingredients.
- Pour the batter into a greased and floured cake pan.
- Bake for 20-25 minutes or until a toothpick inserted comes out clean.
- Let the cake cool completely.
- Spread softened strawberry ice cream over the cooled sponge base.
- Top with fresh sliced strawberries.
- Freeze the cake for at least 4 hours before serving.
Notes
Let the ice cream soften for about 15 minutes before spreading it over the sponge base to ensure it’s easy to work with. Use any seasonal berries if strawberries are not available. To make slicing easier, thaw the cake for 15 minutes and run your knife under hot water before cutting.
- Prep Time: 15 minutes
- Cook Time: 25 minutes
- Category: Dessert
- Method: Baking
- Cuisine: American
Nutrition
- Serving Size: 1 slice
- Calories: 350
- Sugar: 30
- Sodium: 150
- Fat: 15
- Carbohydrates: 45
- Fiber: 2
- Protein: 6
- Cholesterol: 70
Frequently Asked Questions
How far ahead can I make this?
The assembled cake keeps in the freezer, well wrapped, for up to a week. The sponge does not dry out because the ice cream insulates it. Add the fresh strawberries no more than a day before serving.
Can I use a different ice cream flavor?
Any fruit ice cream works. Mango, raspberry, or mixed berry would all pair well with the chocolate sponge. Avoid flavors with mix-ins like cookie dough that make slicing uneven.
How do I get clean slices?
Dip a sharp knife in hot water and wipe it dry between each cut. The hot blade glides through the frozen layers cleanly. A cold knife drags and cracks the surface.