
Cottage Cheese Flatbread bakes up sturdy, flexible, and surprisingly satisfying with just cottage cheese and eggs. It’s a great “always-in-the-fridge” base for quick pizzas, wraps, and lunch sandwiches all week.
109 CAL 3g CARBS 5g FAT 12g PROTEIN
Cottage Cheese Flatbread Recipe
If you’ve been on TikTok for more than five minutes lately, you’ve probably seen this cottage cheese flatbread situation. People are blending cottage cheese and eggs, pouring it on a sheet pan, and pulling out a high-protein “bread” that somehow works for wraps, pizza, and sandwiches. I was skeptical too, but yep… it’s legit!
It bakes up golden at the edges, soft and flexible in the middle, and it actually holds fillings without falling apart (as long as you let it cool a bit). The flavor is mild and savory, especially with garlic powder and Italian seasoning, so it plays nicely with basically anything you’d normally put in a wrap.
I like making a batch when I’m already in the kitchen, slicing it into rectangles, and using it for quick lunches all week. Some days it’s a pizza base, other days it’s a turkey wrap, and sometimes it’s just dipped in marinara because I have zero chill around anything bread-adjacent.
Before You Get Started
Here are a few quick things to set you up for success.
- Cottage cheese texture: If your cottage cheese looks very watery, drain it for a few minutes so the baked flatbread isn’t overly soft.
- Parchment is key: Line the pan and fold the edges up a bit so you can lift the whole slab out cleanly.
- Blend until silky: A blender or food processor gives the smoothest texture (no curds), especially if you want it to feel wrap-like.
- Seasoning add-ins: Black pepper is always good, and a pinch of red pepper flakes is great if you want a little heat.
How to Make Viral Cottage Cheese Flatbread
Here’s the simple step-by-step. It’s mostly hands-off once it’s in the oven!
1. Heat The Oven And Prep The Pan
Preheat the oven to 350°F. Line a 9×13 baking sheet with parchment paper, folding it up at the edges.
Pro tip: Lightly spray the parchment if you want extra insurance against sticking.
2. Blend The Batter
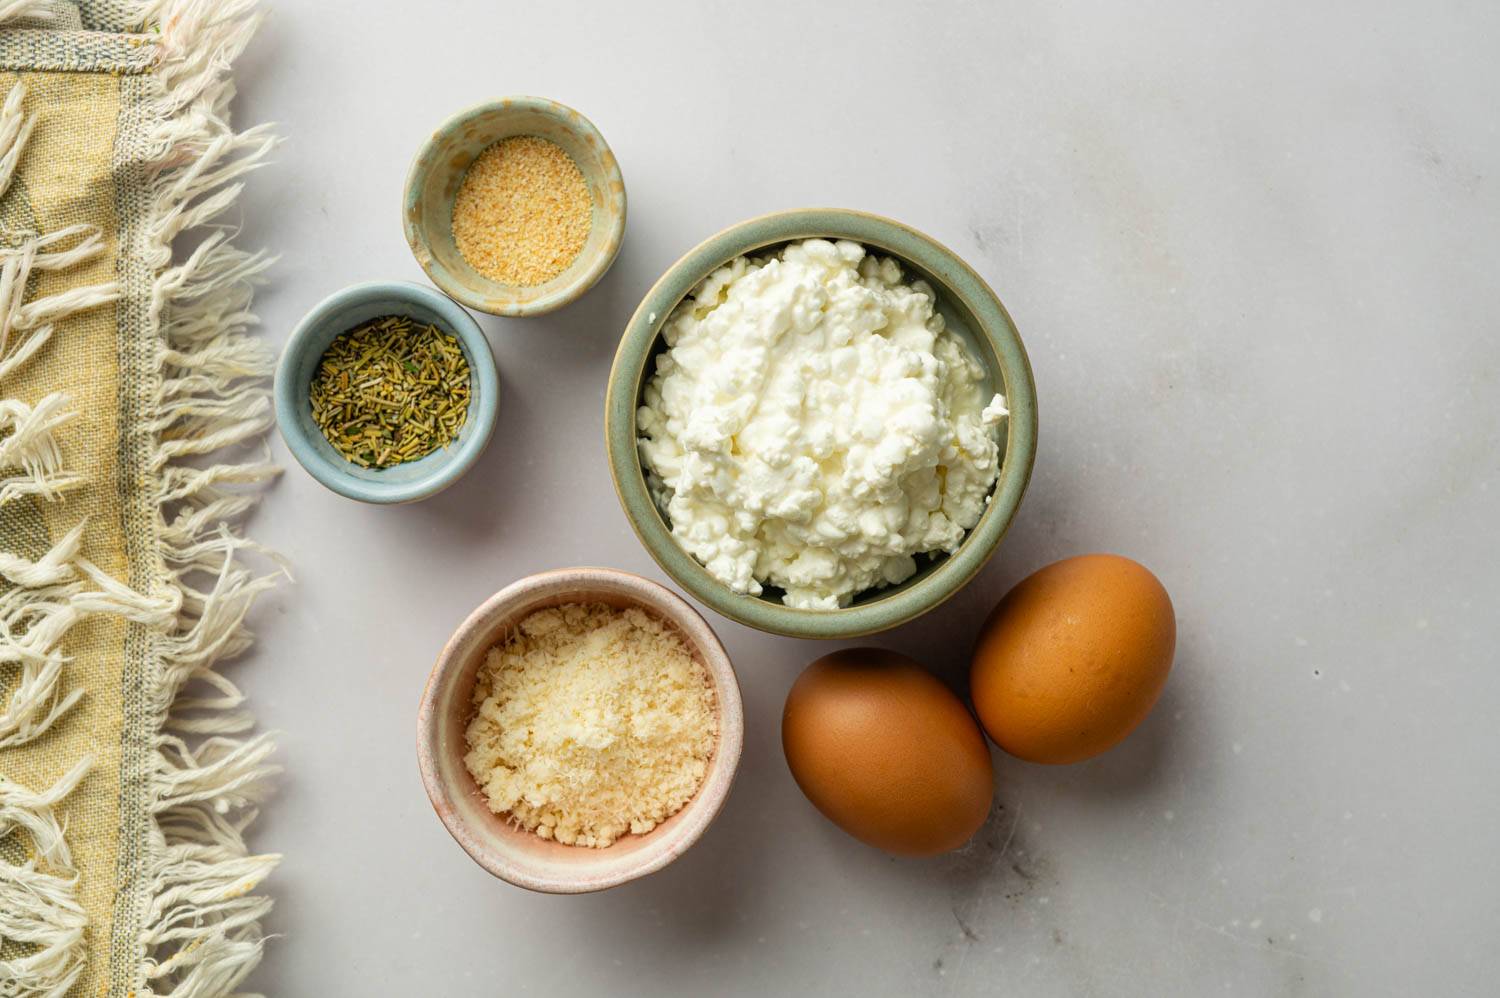
Add the cottage cheese, eggs, Parmesan (if using), garlic powder, Italian seasoning, plus salt and pepper to a blender or food processor. Blend until completely smooth.
3. Spread Into An Even Layer
Pour the mixture onto the lined pan. Use a spatula to spread it into an even layer, or gently tilt the pan until it levels out.
Pro tip: Get the thickness as even as you can so the middle and edges finish at the same time.
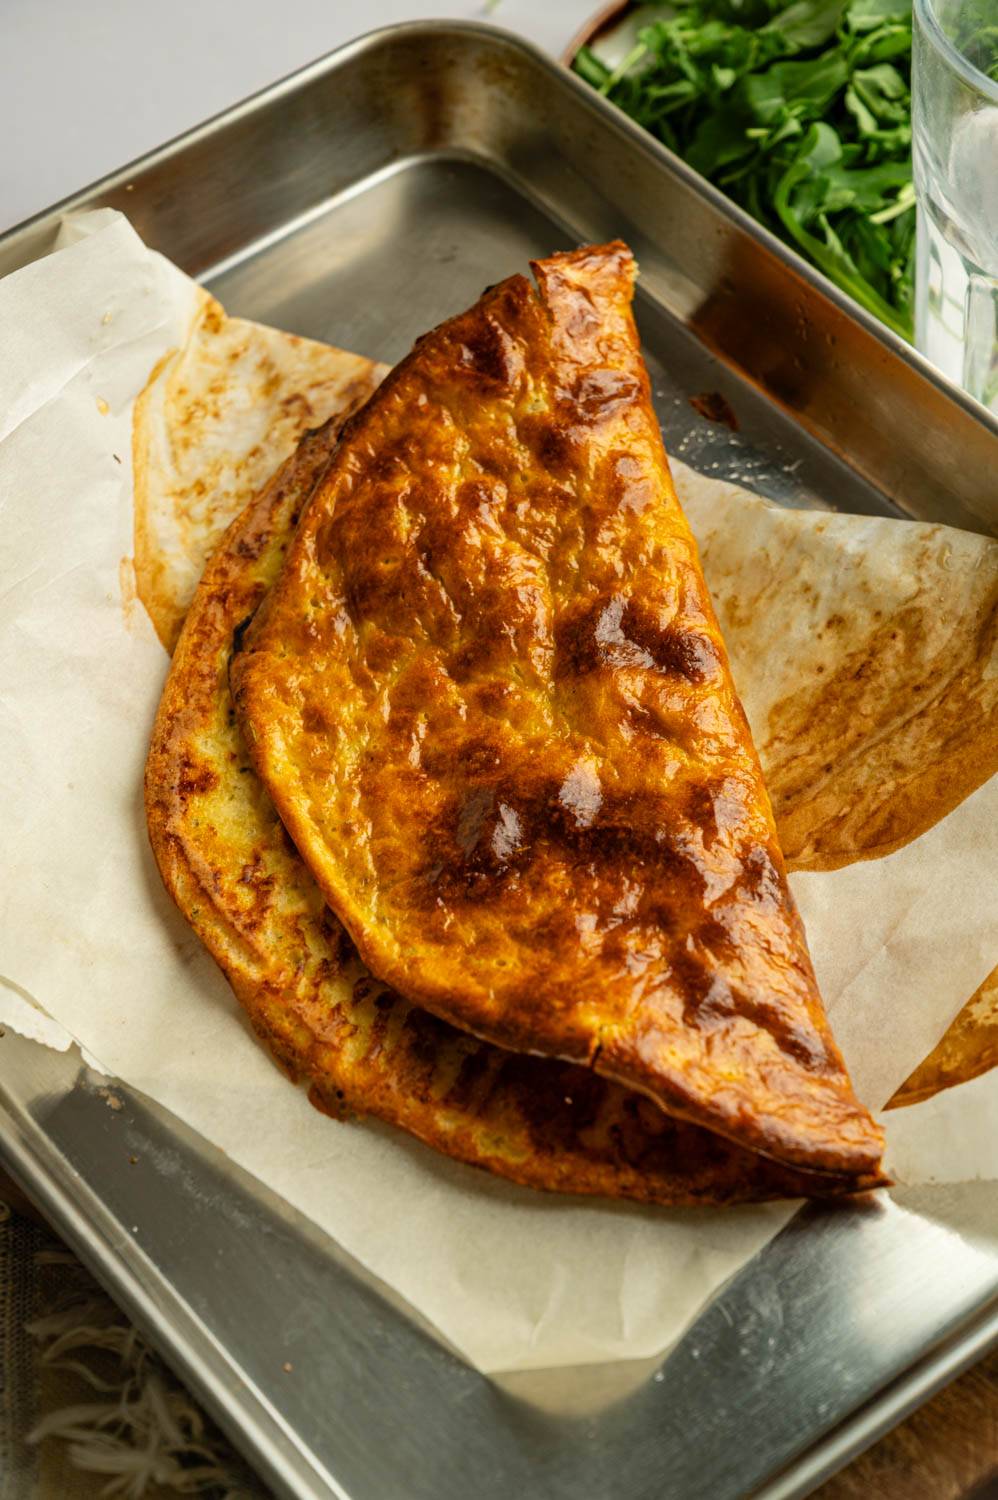
4. Bake Until Golden And Set
Bake for 30–40 minutes, until the edges are golden brown and the center looks set (mine is usually around 35 minutes).
Pro tip: If the top looks set but pale, give it a few more minutes. Color equals better structure.
5. Cool Briefly, Then Slice
Let it cool for at least 5 minutes. It will puff up, then settle as it cools. Slice into squares or rectangles.
Pro tip: For cleaner slices, let it cool a bit longer, then cut with a sharp knife or pizza cutter.
Recipe Tips and Tricks
A few smart moves to get the texture you want every time.
- Want it sturdier: Bake a little longer so the center is fully set, and the edges are more deeply browned. It folds better once it’s cooked through.
- Want it more “bread-y”: Add the Parmesan for extra savory flavor and a slightly firmer bite.
- Crispier finish: After slicing, toast pieces in a dry skillet for 1–2 minutes per side to add structure and a little crunch.
- Make mini rounds: Bake the full sheet, then cut into circles for little personal pizzas or sandwich thins.
- Spice option: Add red pepper flakes before blending if you want a subtle heat throughout.
Serving Ideas
Here are some easy, actually-useful ways to turn this into meals.
- Easy pizza night: Spread with Easy Homemade Marinara Sauce, add mozzarella and toppings, then broil just until melty and bubbly!
- Greek-style wrap: Use it as your wrap for Chicken Gyros with Tzatziki (I like extra cucumber and red onion for crunch)!
- Buffalo lunch wrap: Fill it like a high-protein wrap with Buffalo Ranch Chicken Wraps ingredients, then toast in a skillet to seal it!
- Flatbread “tacos”: Make it a fun base for Chicken Carnitas Tacos style fillings (pile on cilantro, onion, and lime)!
- Dippy snack plate: Cut into strips and serve with warm marinara or a creamy dip alongside veggies for an easy snacky lunch!
Storage & Reheating
Here’s how to keep it tasting good after day one.
- Storage: Cool completely, then store between sheets of parchment in an airtight container in the fridge for up to 4–5 days.
- Freezer: Freeze pieces with parchment between them in a freezer bag for up to 2 months (thaw in the fridge overnight for best texture).
- Reheating: Reheat in a skillet over medium heat for the best structure, or air fry for 1–2 minutes at 350°F until warmed through.
- Leftovers: Use cold like a wrap, toast into “chips” for dipping, or turn into a quick pizza base with sauce and cheese.
Frequently Asked Questions
Here are some of the most commonly asked questions about this recipe:
Why did my flatbread come out watery or too soft?
Usually, it’s excess moisture in the cottage cheese or the flatbread being underbaked. Draining watery cottage cheese can help a lot, and baking until the center is fully set makes it sturdier.
Do I have to use a blender?
No, but the blender gives the smoothest, most “wrap-like” result. If you mix by hand, expect a more curd-textured flatbread (still tasty, just different).
Can I turn this into a crispy pizza crust?
You can get it crispier by baking until deeply golden, then adding toppings and broiling briefly. For extra crispness, pre-toast a cut piece in a skillet before topping.